Table of Contents
-
Creating Your Deal and Entering Basic Deal Information
-
Adding Financial Information
-
Adding Loan Request Information
-
Adding Lenders to the Lender List
-
Reaching Out to Lenders
-
The Placement Table
-
Editing Your Initial Email
-
Managing Lender Responses
-
Types of Contacts in the Placement Table
-
Viewing Lender Conversations in the Placement Table
-
Using Auto Follow-Ups
-
-
Managing Files & Using Vault
-
Managing Files from the Resources Tab
-
Using Vault and Creating OM's with Memo
-
Creating Your Deal and Entering Basic Deal Information
After logging in to Lev, click create a deal on the left hand side to begin the deal creation process.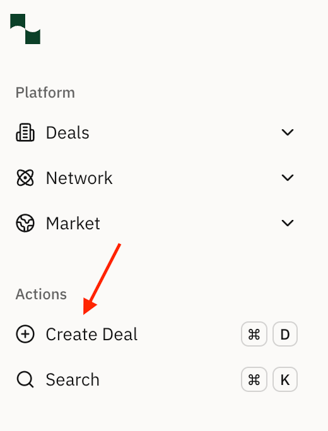
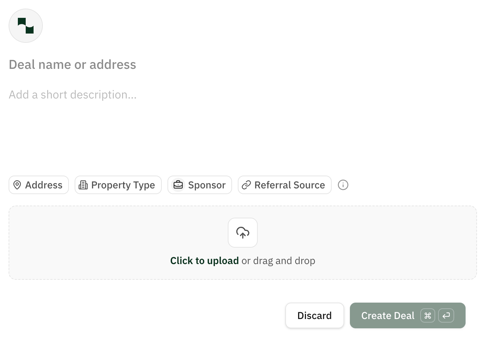
- The platform will then prompt you to enter your Basic Deal Information, such as the Address, Property Type + Subtype, & Sponsor.
- The deal name and description are for internal reference only and won't be shared with lenders.
Tip: There are certain inputs that will impact the lender list when entering your deal information, including:
-
- Property Address
- Property Type
- Loan Type
- Loan Request Amount
- Sponsor Location
- Sponsor Location doesn't always impact the lender list, but it can if a lender prefers an in-state sponsor
- For a mixed use property, we suggest entering the property type as the portion of the asset which generates the most income.
- Example: If you're creating a deal for a Multifamily property with a Retail component, and the income generated from the housing unit(s) is larger than the income generated from the Retail component, we would suggest you enter Multifamily as the property type.
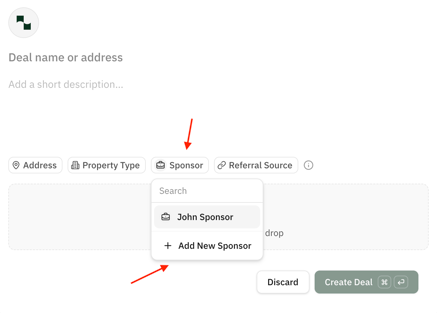
- Next enter your Sponsor information.
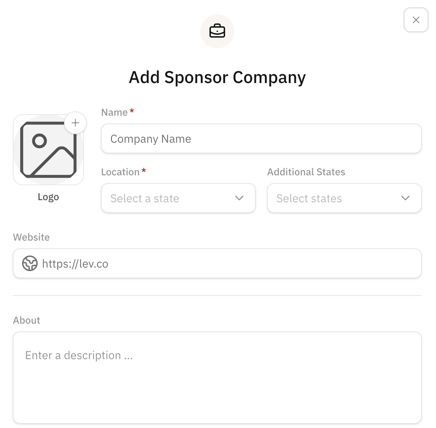
- You can add a new Sponsor for this deal by clicking the Sponsor button followed by Add New sponsor, and entering the Sponsor's information on the next screen.
- This sponsor can now be used for future deals as well.

- From the Deal Overview Page, click Complete Basic Deal Information under Suggested Next Steps and simply confirm that the inputs you previously entered are accurate.
- Click Save & Next to proceed.

- The last pieces of basic deal information you'll need to include are the following:
- Loan Type
- Permanent Loan, Bridge Loan, or Construction Loan
- Transaction Type
- Acquisition or Refinance
- Loan Positon
- First Mortgage Loan (Senior Debt) or Subordinate Loan (Mezzanine Debt/Junior Debt)
- Loan Type
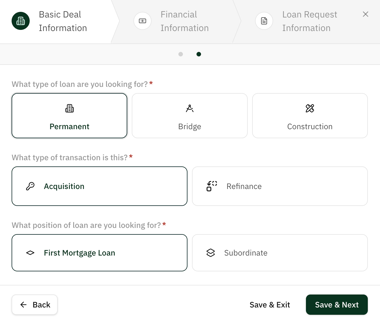
Tip: Loan Type, Transaction Type, and Loan Position will all impact the Lender List for a deal.
Click Save & Next to move forward and begin inputting Financial Information for the deal.
Note: You cannot edit Basic Deal Information after you have selected lenders and they appear on the placement table in the Outreach tab.
Adding Financial Information
- Enter the required Financial Information for the deal, which includes:
- Purchase Price
- Pre Sale Agreement/Letter of Intent Expiration Date (PSA/NOI)
- If you don't have a PSA or LOI, you can check the box marked No signed PSA/LOI
- In Place Occupancy
-
- Net Operating Income (NOI)
- Required Equity Commitment

Click Save & Next to move forward and begin inputting the Loan Request Information.
Adding Loan Request Information
- Enter the type of recourse that the borrower for this deal is able accept. These can be:
- Personal Recourse
- Fund Recourse
- No Recourse
- Next, enter the corresponding level of recourse that the borrower is comfortable with:
- Full Recourse
- Partial Recourse
- Burn Off
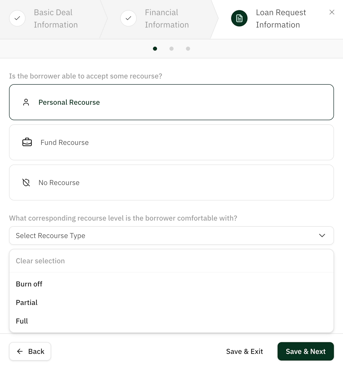
Tip: Recourse won't impact which lenders appear on the Lender List, but it will impact how lenders are ranked in terms of how strong a fit they are for your deal.
- Next, enter your Loan Request Amount. The platform will then automatically determine your corresponding Loan to Value (LTV) Ratio as well as the Total Capitalization amount and Last Dollar LTV Ratio.
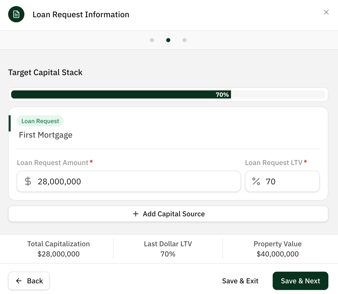
- In most cases, we suggest keeping the LTV Ratio below 75% in order to maximize the chances that your deal obtains financing.
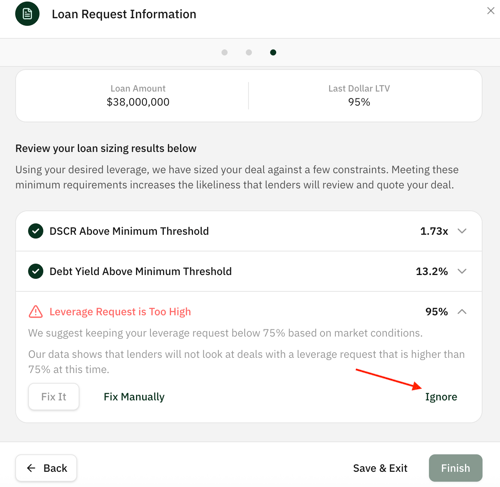
- Click Save & Next to proceed to the next page where your loan will be reviewed by our Loan Sizing Tool.
- This tool compares your loan against similar transactions launched through Lev, and will make suggestions based on market expectations that your deal receives funding.
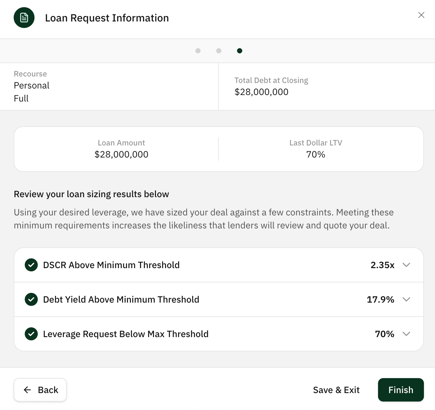
- If the platform indicates that either the DSCR, Debt Yield, or LTV Ratio conditions above are not met, it will give you an option to go back and alter your deal information manually. Alternatively, you can click Fix it to have the platform alter your deal information automatically so that all sizing conditions are met.
Tip: None of the three sizing conditions need to be met in order to launch your deal. The platform is only making suggestions in order to increase the likelihood that your deal receives financing.
If you don't want to change your deal information, you can click Ignore on any unmet condition to proceed with deal creation.
Adding Lenders to the Lender List
Click Select Lenders under Suggested Next Steps to begin choosing lenders that you can send your deal to.
- Now that you've entered the full scope of Basic Deal Information, Financial Information, and Loan Request Information, the platform will analyze program data compiled from over 7,000 lenders to determine which lenders are the best fit for your deal.
- Lenders will appear on this page in order of how highly the platform ranks them in terms of a potential deal fit, so the best possible matches will always appear at the top of the list.
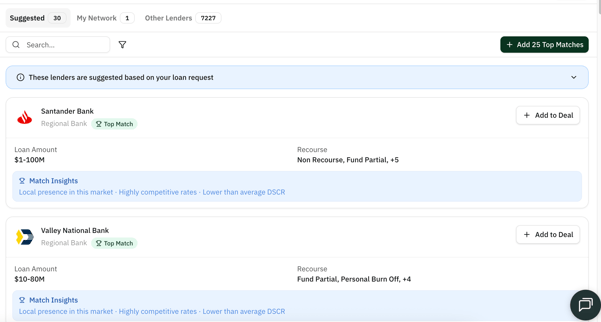
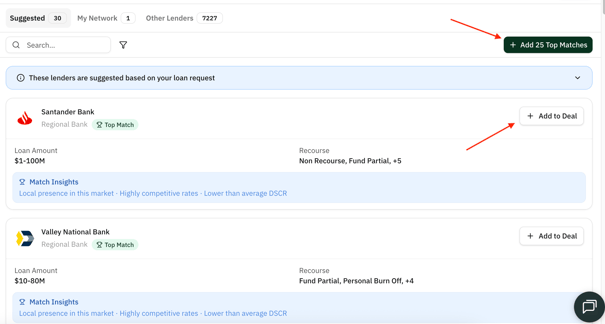
- You can add a lender to your deal individually by clicking + Add to Deal, or you can include the best 25 lender fits by clicking +Add 25 Top Matches.
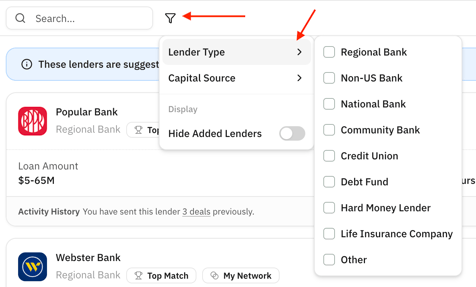
- If you want to only view specific types of lenders, such as Banks, Debt Funds, or Credit Unions, use the filter icon to toggle which lender types appear on the page.
- Lenders will also be grouped by institutions that Lev suggests based on program data, or by lenders from your internal contact list.
Tip: Any lender contact from your internal contact list can be added to deals you create, even if the platform deems the lender to be a poor fit.

Once you've made your lender selections, click Done to proceed to the placement table where you can begin reaching out to lenders
- You can always come back to this page and add more lenders to the deal, regardless of what stage the deal is at.
Reaching out to Lenders
The Placement Table
Your placement table serves as your home base for lender outreach on each individual deal.
- You can send out your deal to all contacts in the placement table by clicking Actions in the top right, then send your initial email from the drop down menu.

Editing Your Initial Email
- On the next screen you can edit the first message you will send to lenders when launching your deal by clicking directly into the email body.
- Click Inputs on the right to open a drop-down menu where you can insert various links, like links to a Vault or OM/Deal Book.
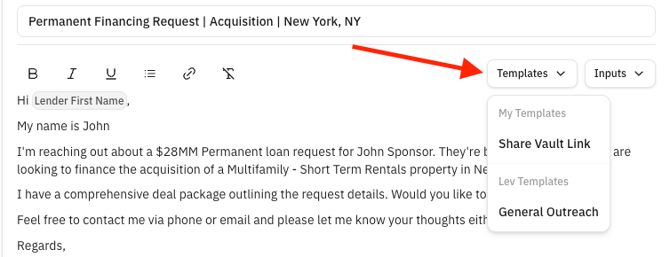
Tip: Remember, we suggest you don't include any links or attachments in the initial email to a lender.
- Once you've confirmed your email language, Click Preview & Send to review your email template and follow up settings one more time, then click Next and you'll have officially launched your deal!
Managing Lender Responses
- After your initial email has been sent to lenders, their stage will change depending on the lenders response. The AI will determine what stage the deal is moved to based on the corresponding conversation with each lender.
- Placement stages can also be adjusted manually at any time by clicking the stage to open a drop down menu.
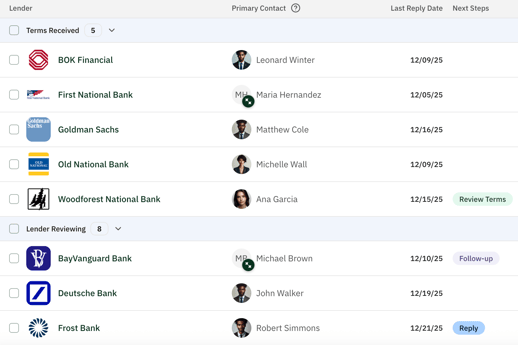
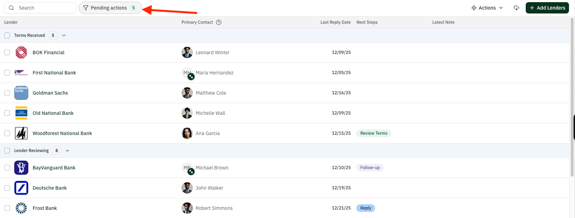
- To view the placement table filtered by lender conversations only where next steps are available, click Pending Options in the top left.
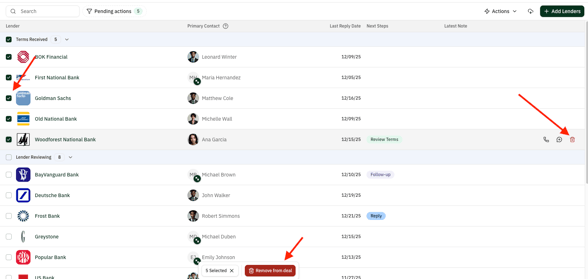
- To remove individual lenders from the deal, click the red trash can icon the right of each placement.
- To remove lenders in bulk, you can check the box on the left of each lender you'd like to remove, click the red Remove from deal button on the bottom.
- To remove lenders in bulk, you can check the box on the left of each lender you'd like to remove, click the red Remove from deal button on the bottom.
Types of Contacts in the Placement Table
Each lender contact will have a different color icon next to the contact's picture which indicates the level of familiarity you have with the contact.
- A lender contact with a green icon indicates this is the best suggested contact by the Lev platform.
- A grey icon indicates this is an internal contact and is the best suggested contact by the Lev platform.

Viewing Lender Conversations in the Placement Table
To view a conversation with an individual lender, click into the placement to open the corresponding email thread.
- The email thread will open up on the right side of the screen, where you can click through individual emails in the thread.
- The lender contact's information from each conversation will be shown on the top right.
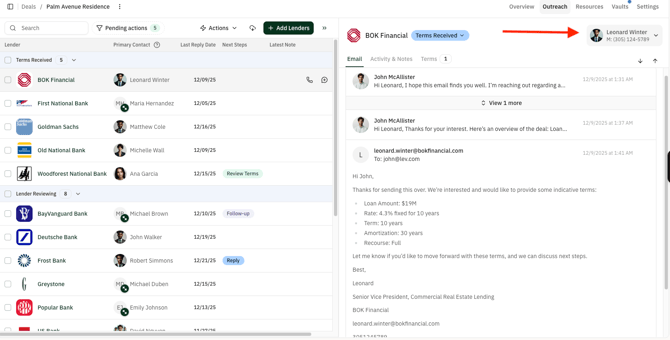
- You can reply directly to lenders from this view as well.
- To use any email templates you have created, click templates on the top right of the email body to open a drop-down menu and make your selection.

Tip: Using Email Relay
- If you are ever missing emails in a conversation with a lender that was launched on Lev platform, you can forward the first missing email in that thread to assistant@lev.com and AI will automatically import the missing emails onto the platform.
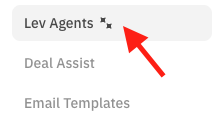
Using Auto Follow-Ups
To view your Auto Follow-Up settings for a deal, click settings on the top right, then select Lev Agents.
![]()
- From this screen you can toggle any Auto-Follow Ups you want to use on this deal.
- We suggest sending two follow-ups to each new lender contact, which is what your default settings will be toggled to.

Managing Files and Using Vault
Managing Files from the Resources Tab
To view any files you have uploaded for this deal, click Resources.
![]()
- Files will be listed by Name and File Type.

- If you wan to add a file to a Vault, click + Add to shared vault on the right.

- You can upload any files by clicking Add Content on the top right.

Using Vault and Creating OM's with Memo
A Vault is a dedicated file sharing location that can be shared with Lenders for each deal
- To view your Vaults for a deal, click the Vaults tab on the top right of your screen.
Warning: You decide the level of access each lender contact has to each vault.
![]()
- On the next screen you can view all the vaults designated for this deal.
- To create a new Vault, click Create New Vault on the right side of the screen.
- Your OM/Dealbook will always be stored in the vault named Deal Room.

You can find a more detailed guide to Vaults here.
- To create an AI-generated a deal book based on the files you've added to this deal, click into the Deal Room Vault and then click Generate OM
- The platform will then use Memo to create a customized OM for this deal
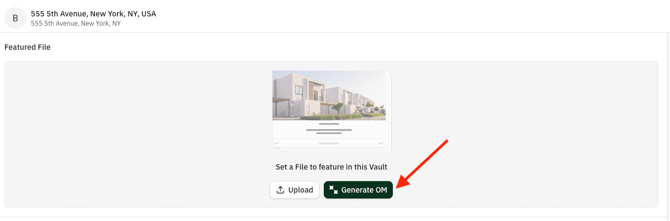
You can find a more detailed guide to Memo here.